UI Interest Group Blog

Community Browser
cancel
Showing results for 
Search instead for 
Did you mean: 
DanishAhmad
6824 Views
0 Comments

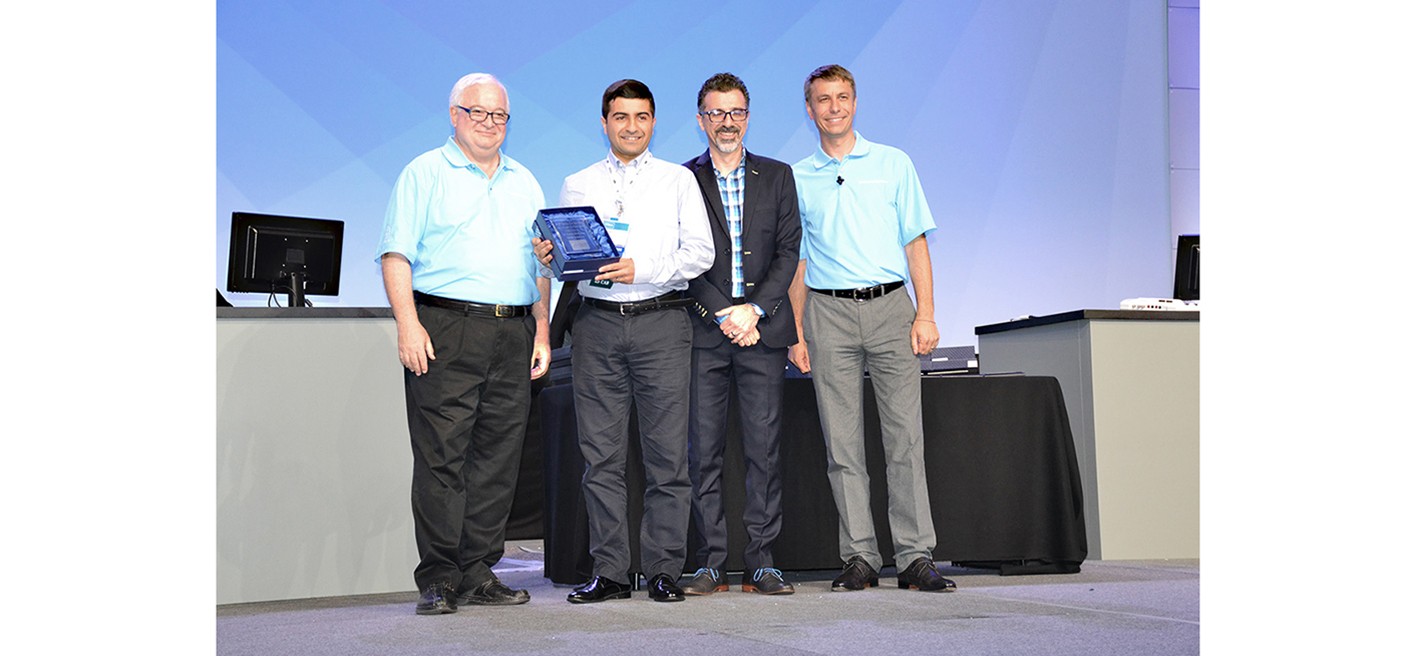
DSC_03383.jpg

RAFA Solutions' UI Control Kits being the winner for LabVIEW Tool Network product of the Year Award for 'Developer productivity' have also prepared a technical session for "Designing Advanced User Interface in LabVIEW" and provided the best practices for designing user-friendly and intuitive UIs for applications developed in the LabVIEW environment. The presentation explored several examples showing the main differences between UI designs depending on applications and intended users.

For more information please visit this link, here you can watch the session and download presentation.

MDPatil
7535 Views
1 Comment

Can Event structure be handled in Sub VI's? If yes then what is its method.

Ludwig72
7058 Views
0 Comments

Hi together,

I created an XControl for collapsing and expanding controls. It is just an suggestion to discuss.

Improvements are welcome. Things I have in my head are speed optimization and plugin-like data for the content of the controls.

https://decibel.ni.com/content/docs/DOC-40445

Regards

Ludwig

NickeN
8850 Views
2 Comments

First I hope I have posted in a relevant forum.  To improve the UI interactivity I have want to include a picture with some simple graphics (omitted for simplicity) representing an area in my UI.  I would like to create Firstly; objects based on coordinates in this picture and and Secondly; be able to click or right click the objects to get a menu like in the attaced  .jpg

To solve the first task I basically tracked the coordinates and printed a textbox. Then by monitoring the coordinates for the mouse I know if I clicked the the textbox "object". I assume that there might be more efficient ways to create these object, having properites or nodes that would help in my second task, which is in either case challenging..

Thankful for suggestions!

Cheers

Nicke

cacalderon
29570 Views
2 Comments

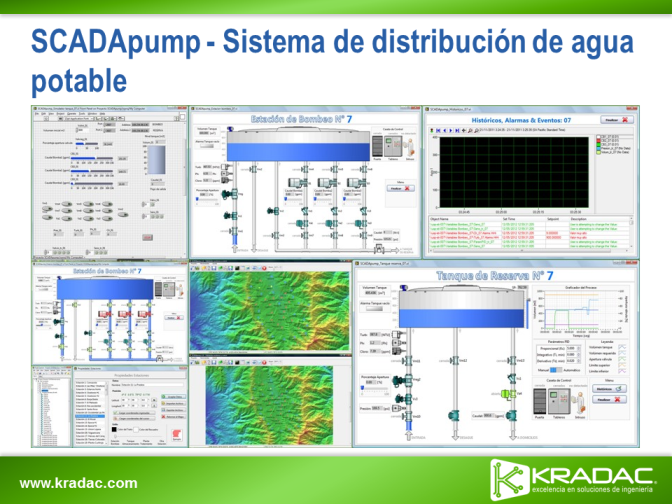
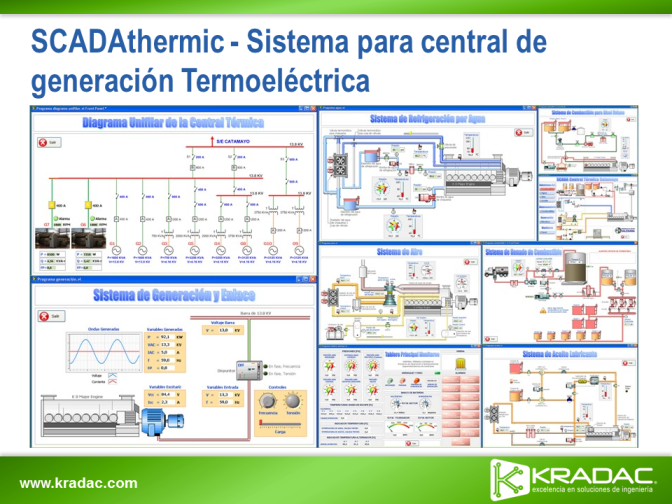
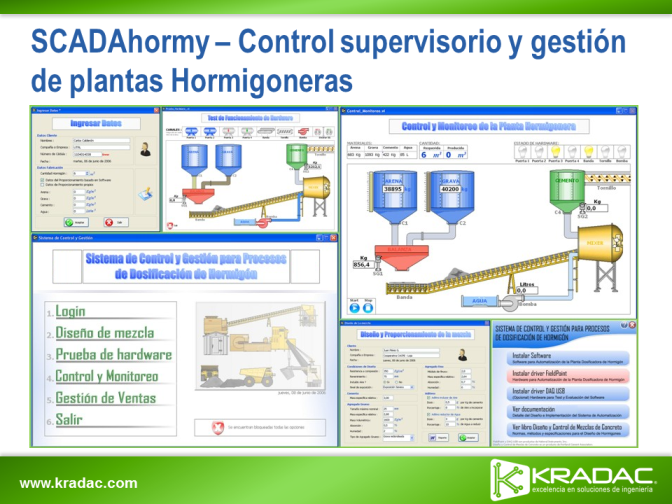
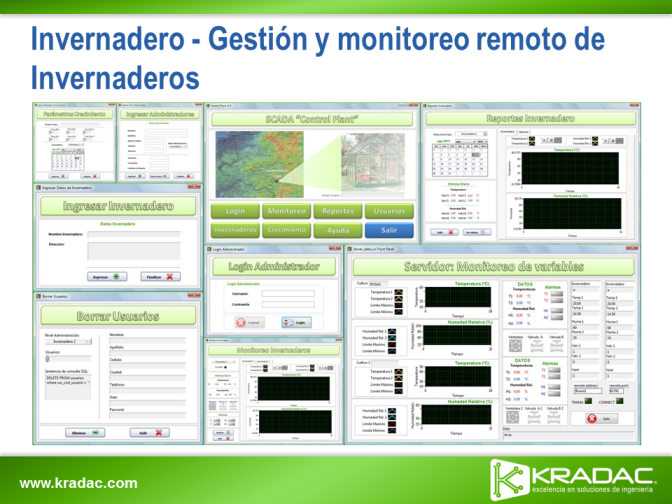
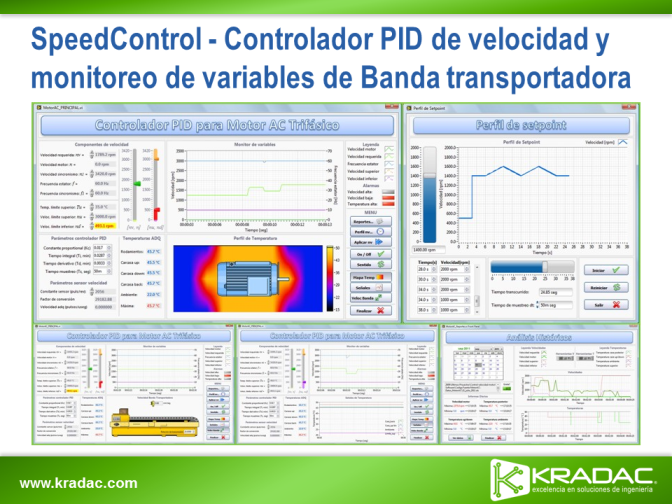
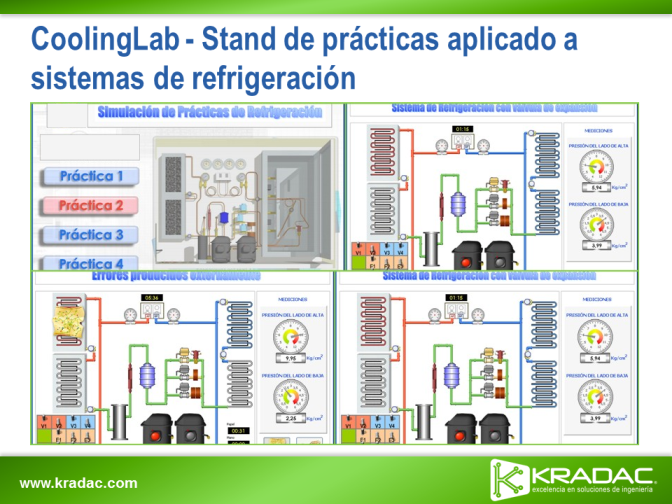
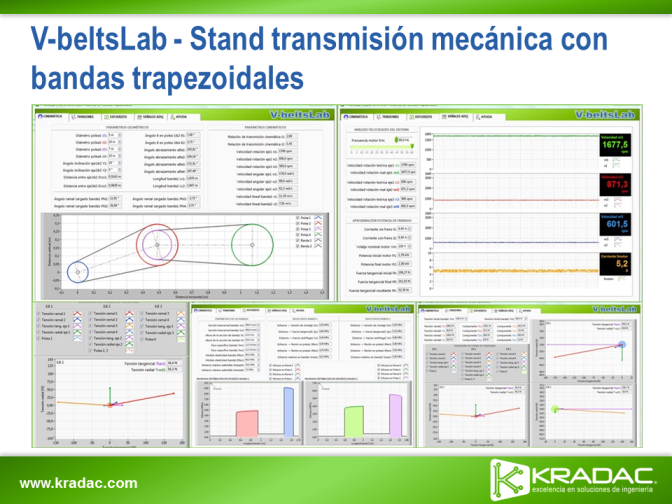
I present them my gallery of snapshots of applications developed in LabVIEW.

I thank to some members of LabVIEW-user groups, for their contributions with regard to the design of GUIs.

GUI Gallery Link:

https://www.facebook.com/media/set/?set=a.598057340260619.1073741827.131454403587584&type=1&l=3e64de...

1Diapositiva SCADApump.png

2Diapositiva SCADAthermic.png

3Diapositiva SCADAhormy.png

4Diapositiva Invernadero.png

5Diapositiva SpeedControl.png

6Diapositiva CoolingLab.png

7Diapositiva V-beltsLab.png

SimonH
13893 Views
0 Comments

After seeing this idea exchange post I decided to investigate a couple of ways of implementing that functionality in LabVIEW today.

In this video (and the attached code) I demonstrate two reusable ways of adding an "Explore" option to file paths. The first is creating a new XControl that adds the Explore option but otherwise behaves and looks like the File Path control. The advantage of this technique is that the Explore option is available at edit time. Downsides include having to replace any existing file paths with the XControl and incompatibility with arrays and the like.

The second technique uses the concept of a "BRAT VI" (a child that controls the parent). You drop my VI on your diagram and it adds the Explore option at runtime to any path control or indicator on the front panel of that VI. It does this by getting a reference to it's caller, and registering to recieve events for any path control whenever the shortcut menu is activated or a menu item is selected.

Download All
SimonH
20519 Views
10 Comments

Someone recently asked me if there was a way to standardize LabVIEW font sizes relative to other Windows applications as altenbach describes in his idea exchange post

Screen Shot 2013-06-07 at 3.57.12 PM.png

I did some digging and was able to write a VI to convert a point size into the equivalent LabVIEW size.

Screen Shot 2013-06-07 at 4.02.26 PM.png

I'm posting here just in case anyone else is in need of this functionality. (Note that I haven't tested the backsaved LabVIEW 8.0 VI)

Download All
MDPatil
17691 Views
4 Comments

I make .exe, using Properties I hidden menu bar.

Menu bar is only hidden when exe is running.

But when we stop the exe then again Menu bar is come.

Problem: I never want to show menu bar.....when exe is not run means ideal mode.

I trying by run timemenu bar and file-> property option.

still propelm is remain.

plz help me.

~Samuli
22331 Views
10 Comments

Hello all!

So is it really possible to add any new UI objects to your user interface during run-time and even link data to those new objects? Yeah it is! If you use some nice tricks I made this demo for Northern Europe NIDays last year and I just wanted to share it with our UI Community. The code is pretty simple and I made it for demo purpose only. So it's not ready application with proper error handling etc but you will find some cool functions there that you can reuse with your projects. I tried to keep the code as clean as possible so it should be pretty easy to understand how it works.

With this demo you can add new LabVIEW UI objects to the Front Panel and move those objects around with your right mouse click (works best with LabVIEW 2011 btw. There is some feature in 2012 that will popup the right click menu to the objects even though it is disabled. You can hide the menu by clicking the Esc button during the movement if you use 2012.). you can also link data to these new objects (just watch the video how to do it).

Here is simple video that will show you how it works:

http://screencast.com/t/bRfa1iQfHx

If you have any questions please comment and I will try to answer those. Enjoy!

Best regards,

Samuli

Updated: Added also 2011 verision and fixed one linking problem.

Download All
robertocsp
14597 Views
0 Comments

Hi all, this is LabView 2010 version of subVI with a vertical cluster of fallen oil drops.

Regards, Roberto

robertocsp
17077 Views
3 Comments

Hi all!

As soon as I work for Oil & Gas industry, this code is an alternative to the code developed by Pelle Steen.

Regards,

Roberto

PelleS
24861 Views
21 Comments

Hi guys,

When I installed Visual Studio 2012 Express I noticed their nice loading animation in the bottom. See image below (found on web):

image1.PNG

After a couple of hours, I'm sort of satisfied.

MyScreenShot.png

Just run the file called Loader Example.vi in the attached folder.

If you want to resize the cluster that contains all the moving objects, that should work just fine. And if you want to add more objects than 5 that should also work fine as long as you tweak the "slow speed area" (see code) setting. I imagine if you spend some more time, you can even make nice patterns in the y-direction.

Have fun and please post your improvements,

Pelle

Download All
GrahamB
23206 Views
4 Comments

In my previous post, "Resizable UI’s in LabVIEW", I went through the basics of creating a flexible and professional user interface that scales to any screen resolution. If you’re new to creating resizable user interfaces in LabVIEW, I recommend you start with that post.

Introduction

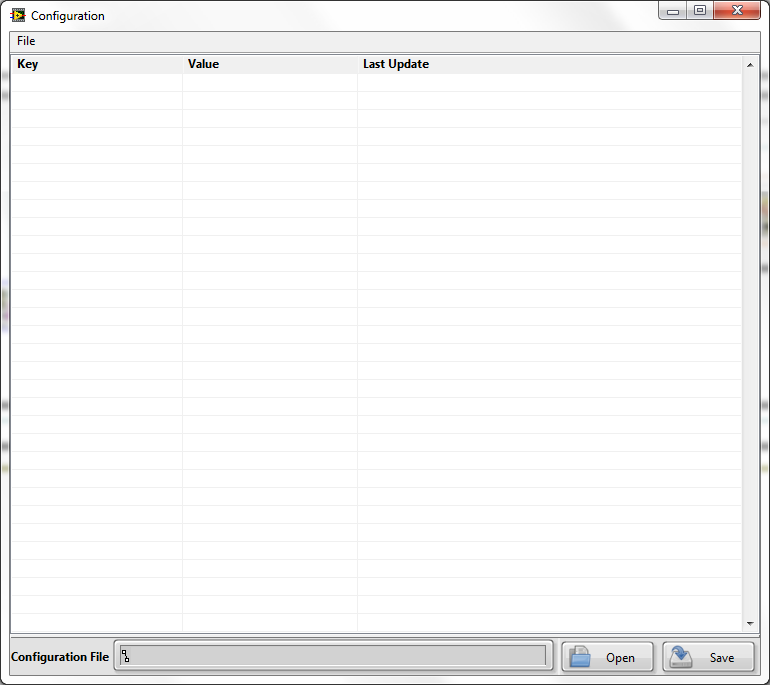
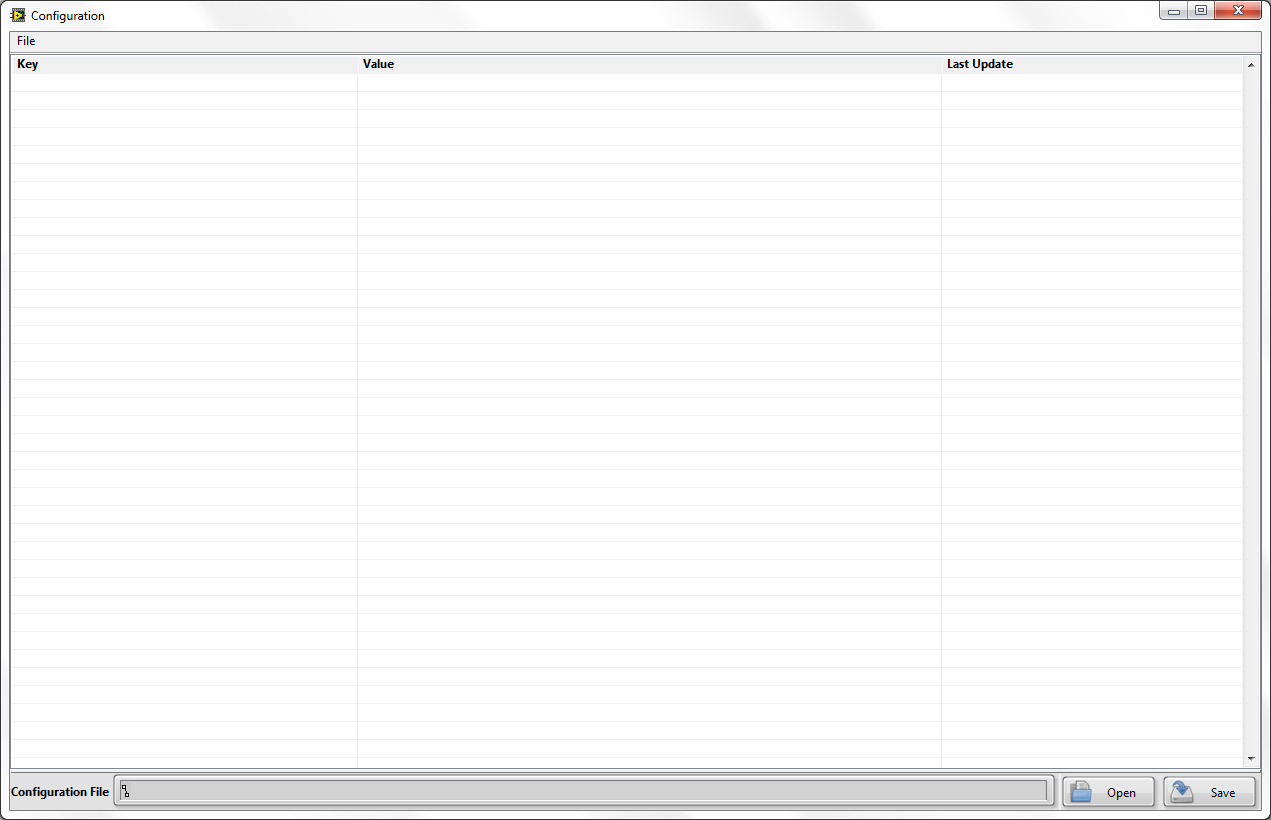
Equipped with an understanding of splitter bars, panes, and fitting controls/indicators it’s easy to imagine how we can create nice looking UIs. So off I go, creating a UI for a new configuration utility. I drop a multicolumn listbox down in my largest pane, fit it to the pane, and set up my columns exactly as I want them.

1.png


Looks good so far – I’ve followed all of the rules about making my UI resize, so let’s maximize this window and watch the resizing glory.

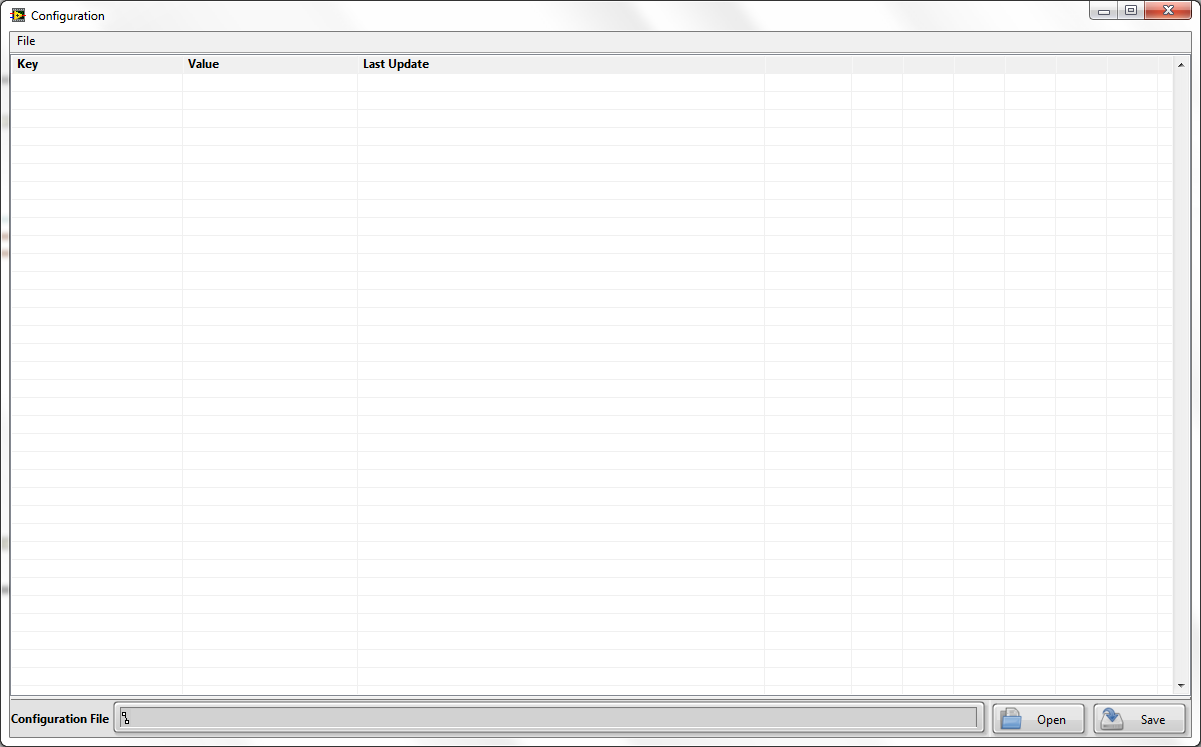
2.png

Not quite what I had in mind. I only need 3 columns, now I have 10. Your natural LabVIEW instinct will tell you start wading through the various property node options but unfortunately you won’t find a quick fix here. This requires code.

When creating complex applications, you will quickly find that the items you want to scale easily, rarely cooperate. In my previous post, I mentioned a few items that require a little more effort and some code to make them work.

Some of these items include:

  • Multicolumn Listboxes
  • XControls
  • Subpanels

In this post, I will only be focusing on Multicolumn listboxes but will be covering XControls and Subpanels in the future.

Multicolumn Listbox Resizing

Multicolumn listboxes tend to resize best vertically. The problem (as demonstrated) is when we expand horizontally we end up with extra columns or fewer columns. The extra columns make the UI appear cluttered and difficult to read. They tend to make your UI look like you’re working in Excel, and the higher the screen resolution – the worse it gets. Now the question is what behavior do I want my multicolumn listbox to take? Here are a few of the most commonly used options:

  1. I want the columns to grow proportionally and distribute across the screen.
  2. I want the columns to hold their width, but have my final column extend to infinity to reduce the amount of clutter.


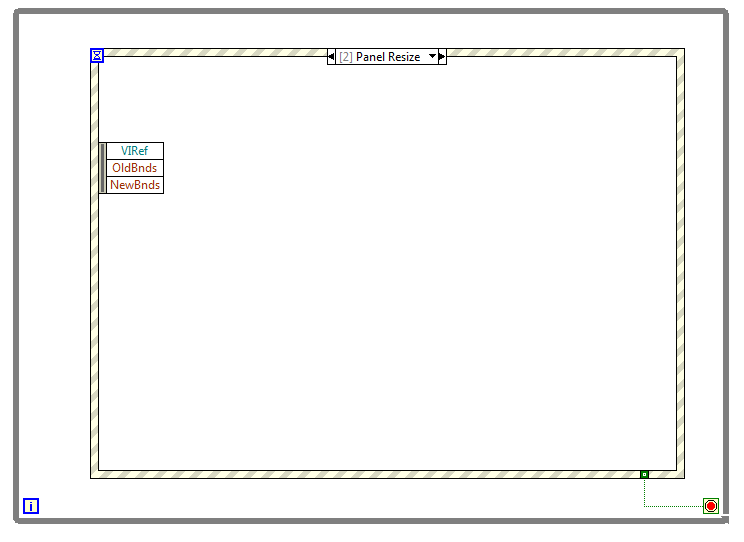
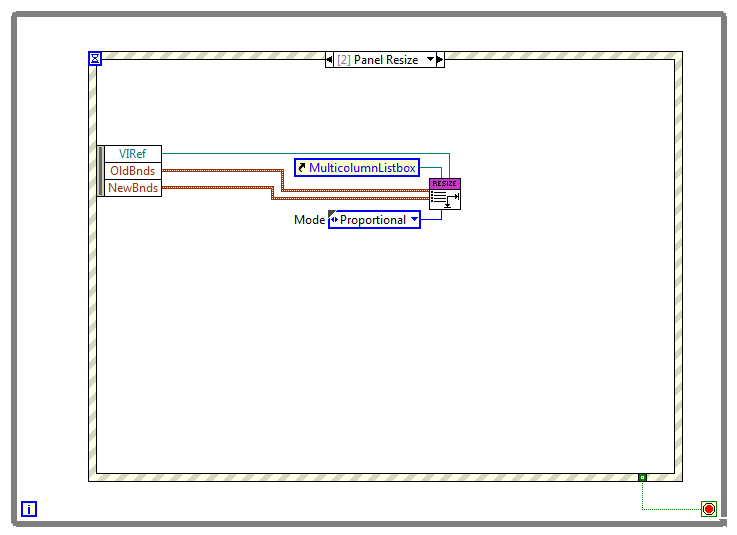
To capture a screen resize event, we can use the event structure and the event for “Panel Resize”. The three properties we can make use of in this event are; VIRef, OldBnds and NewBnds corresponding to the VI reference, the previous screen size, and the new screen size respectively. To complete the process, we need to create a code module to do some multicolumn listbox resizing.

3.png

Proportional Distribution

This is the most commonly used type of multicolumn listbox resizing. We can determine the percentage of the listbox that each column consumes and maintain the proportions as the screen grows or shrinks. This is illustrated below:

4.png

The downside to this method is that data becomes sparse on a large screen resolution. For multicolumn listboxes, which do not occupy the entire screen, proportional distribution is the ideal method. For large listboxes that occupy the entire screen, we may be better off using last column only growth to maintain the look and feel of the application.

Last Column Only

This is another common method for resizing, where only the final column grows. This allows you to maintain the defined column layout, while reducing the clutter introduced by the extra columns typically generated by growing the window.

5.png

This method is nice for listboxes which occupy the entire screen. It maintains your layout and does not space data out or alter the appearance of the application.This is all great, but how is it done? Let’s take a look.

The Code

In order to make this function reusable for many listboxes, we will create a generic subVI. This subVI will be dropped into our event structure for screen resize events.

6.png

The code accepts a VI reference in order to Defer Panel updates; a listbox reference; the old panel size; the new panel size; and a resizing mode.

7.png

For the proportional method on the block diagram, we perform the following steps:

  1. Determine how many pixels the screen has grown by.
  2. Determine if the new bounds are different from the old bounds, if not don’t do anything.
  3. Defer Panel Updates so that the columns resizing happens faster.
  4. Count the number of columns and filter blanks.
  5. Determine the width of each column.
  6. Find the original proportion of the column in relation to the previous screen size.
  7. Adjust each column width proportion multiplied by the new screen size.
  8. Turn off Defer Panel Updates.

8.png

For the last only method on the block diagram, we perform the following steps:

  1. Determine how many pixels the screen has grown by.
  2. Determine if the new bounds are different from the old bounds, if not don’t do anything.
  3. Defer Panel Updates so that the columns resizing happens faster.
  4. Count the number of columns and filter blanks.
  5. Determine the width of the last column.
  6. Find the original proportion of the last column in relation to the previous screen size.
  7. Adjust the last column width proportion multiplied by the new screen size.
  8. Turn off Defer Panel Updates.


Conclusions and Next Steps


These are two simple methods for resizing multicolumn listboxes. You could always adapt your own methods for more complex resizing, such as making specific columns grow and others remain fixed. Using my last post "Resizable UI’s in LabVIEW" and the code presented in this post, more complex resizable user interfaces are now possible. In the future, I will give instructions on creating resizable subpanels and XControls which takes resizing all the way to complex architectures and reusable plugins.


Graham Beauregard

Prolucid Logo.gif

http://www.prolucid.ca

Download All
mvTech
17681 Views
5 Comments

Hi Everyone,

ver.1.1

I have finished my tookit, for LabVIEW and I would like to share it with LabVIEW community. I think, the quality UI become as important part of a LV code as a functionality itself nowdays. Customizing the LV Controls & Indicators can be done many ways, but what about the LV RTM? (Run Time Menu). Maybe the color of RTM can be chage (I'm not sure) but I clearly know there is no way to insert images into menuitems, that could improve the presence of our FP.

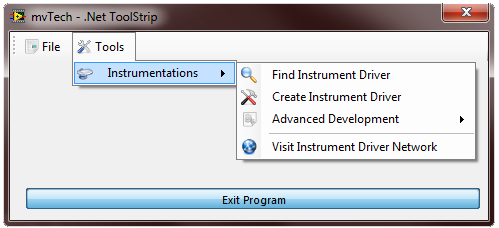
So, I've started to develop a control that may replace the "old-timer" LV RTM. Before saying some words about the toolkit please take a look at the attached pictures.

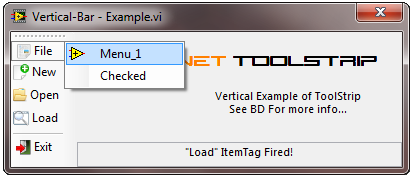
dotnettoolstrip-slide-1.pngVertical Bar - Example.png

The pictures above show the ToolStrip can be used as Horizontal and Vertical dock.

The following docy types are supported:

  • Left / Top / Bottom
  • Right: (Not suggested - DropDownDirection)

The following ToolStripItems are supported already:

ToolStripItem    Functionality
ToolStripButtonSimple Button
ToolStripLabelSimple Text filed
ToolStripSeparatorSeparator Item
ToolStripMenuItemNestable Item (dropdown)

and the following items are under development:

  • ToolStripProgressBar
  • ToolStripTextBox
  • many more...

How to use:

The picture shows and example. (This VI is also available in the package with many more example.)


BD.jpg

Requirements:
  • LabVIEW 2009 or later
  • .Net Framework 2.0 or later
Development
  1. Before use this toolkit, please visit: www.mvtech.eu for more information about usage.
  2. Detalied documentation of VIs is also available here
  3. Toolkit Download Link - the zipped file contains an exe. It is not neccessary to run the exe but makes your life easier if you dont want to copy the toolkit files into user.lib\ manually.

Constraints
  1. ToolStripButton and ToolStripLabel can be inserted dierctly to the ToolStripControl; can not be nested. (TS - AddItem.vi - ParentTag must be empty.)
  2. Parent Tag must refer only ToolStripMenuItem.ItemTag or empty string.

Event Handling:

I think, this is most interesting part of it

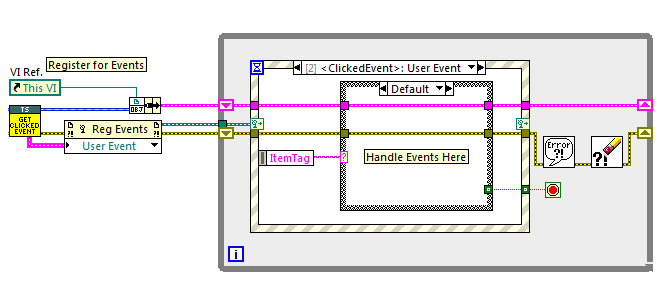
User Level: I want to simplify the event handlig as much as possible, so the user doesn't have to take care .Net Events and more. .Net ClickedEvent is registered for UserEvent and used in the top-level vi. The Event returns the ItemTag of the selected ToolStripItem. This ItemTag is used as a parameter of the following methods:

Method Name
TS - RemoveItem.vi

TS - GetItemCheck.vi

TS - SetItemCheck.vi
TS - GetDisableItem.vi
TS - SetDisableItem.vi

For more info can be found on the website.

EventHandling.png

The picture above shows the event handling part of the code. The ItemTag <string> is an individual identifier of each ToolStripItem.

Checked Property:

Checked States.png

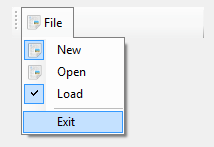
There are two types of checked-state. If a ToolStripMenuItem has any icon, the checked state dispalys as the "New" menuitem. Under the New menuitem, Open item has the same icon but its state is unchecked.

And if the menuitem doesn't have any icon, the standard pipe appears as its state is checked.

Version Overview

v1.3.

Feature Request:

  1. MenuEvents can be handled by Queue.  Please check Example II. The Process Queue is responsible for ToolStrip Event handling. The Queue - Dequeue element returns the ToolStripItem ItemTag.
  2. Password protection removed from subVIs. - Feel free to update or modify the source code.


Licence:

### BSD License (http://www.opensource.org/licenses/bsd-license.php) ###

Copyright (c) 2012, mvTech <info@mvtech.eu> | All rights reserved.

This Full Version tookit is free to use for everyone.

Please place the ToolStrip logo to your application about window.


Source Code:

The complete source code added (without password protection), full of with OO programming tools. ( Recursive algorithm, DVR objects, and so on...)

No Limitation | Full Source Code added

Feel free to use and ask if you have any question!


Download All
GrahamB
36735 Views
11 Comments

Introduction

Often as I open new software and the user interface pops up, I make a few typical clicks around, and I can almost immediately recognize it as a LabVIEW application. It’s funny how as a LabVIEW developer, I can recognize just from a user interface alone and some minor interaction that it has been written in LabVIEW. In the past, I found this true with other development platforms; although this is no longer as obvious. So, what is one of the things that made me suspicious of it being written in LabVIEW besides my familiarity with the common controls/indicators?

The screen would not resize.

It seems that generally speaking there is an opinion that in LabVIEW it just isn’t easy or worthwhile to design a nicely laid out, resizable UI. There aren’t very many good examples or documentation available, but it is really quite simple to accomplish. Resizable UI’s give a great feel to clients and give your software added professionalism at very little cost to developers. There is one caveat to this though, it should be considered up front at design time. Completing software without this in mind and trying to convert a UI to become resizable is typically a nightmare and should be avoided when possible. This is most especially true with complex UIs.

So, how is it done?

(After reading this please check out my follow up blog: Advanced Resizable UIs: Multicolumn Listboxes)

Planning

The most important step in making a UI resizable is some up front planning. Typically, we do some mock ups of how we anticipate the user interface to look and feel. This is a good time to plan which aspects you want to resize, and which you do not.

Elements to Scale

Elements you wish to resize or not resize should be grouped into sections.

In a LabVIEW application, the following elements typically should resize:

  • Graphs/Charts
  • Multicolumn Listboxes (extra code often required)
  • Image Acquisition
  • Tab Controls
  • Subpanels (extra code often required)

The following elements generally should not resize:

  • Text, Numeric, Boolean controls/indicators
  • Buttons
  • Static images
  • Enums, Ring control/indicators

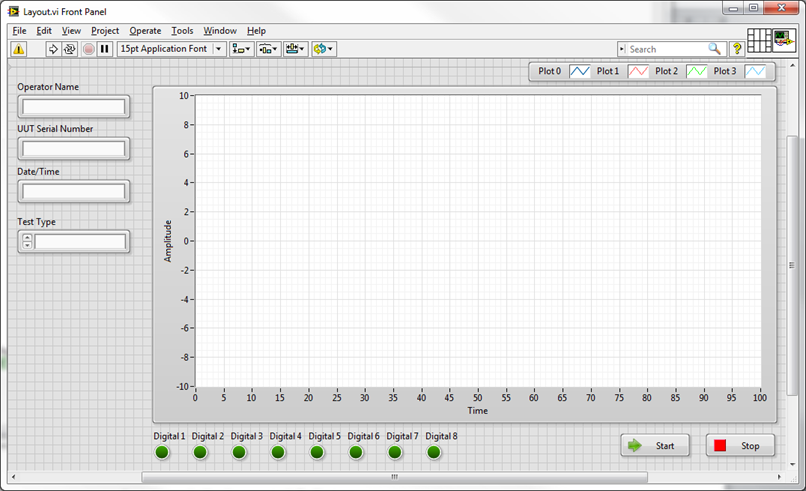
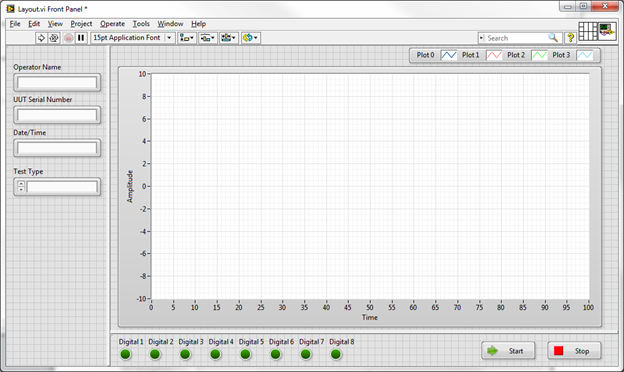
Keep in mind these are just general recommendations, not rules. See the image below for my sample layout. Notice I have grouped elements such as text inputs, Boolean indicators, and buttons which I do not want to change size.

In this example, the only element I want to scale as the UI resizes is the graph.

1.png

Splitters

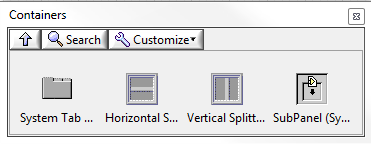
Now it’s time to add one of the more underutilized elements on the front panel palette – splitters. These can be found under the “Containers” palette in both Modern and System sections. Adding a splitter to your VI will create a hierarchy of “Panes” on your front panel. Each pane can be considered a section of your front panel that can have separate resizing settings from the rest of the UI.

2.png

There are horizontal and vertical splitters, and which you choose first is more important than you might think. It depends on your intended layout, but using my example it is obvious we want all of my text inputs to stay on the left as well I may want to leave some room below for future additions. As well, I want to keep my digital indicators in line with the left side of the graph. In order to keep the entire left side usable and clean, we should start with a vertical splitter.

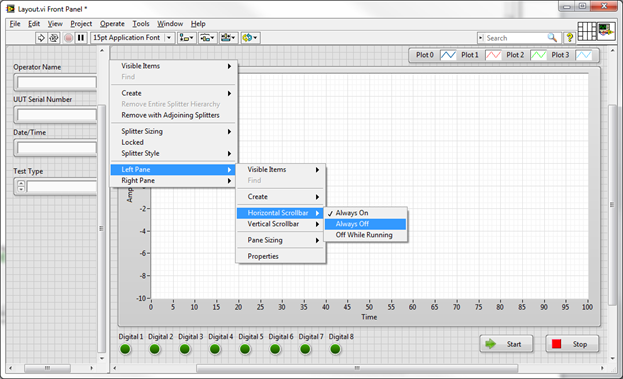
Drag a splitter onto the front panel and section off the left text boxes from the graph as shown below. At this point, it’s going to look a little sloppy with scroll bars everywhere. Simply right click on the splitter bar, drill down to the pane you are concerned with and turn off each scrollbar to clean things up.

3.png

Repeat the same process for a horizontal splitter to section off the bottom digital inputs and buttons. Your screen should look as shown below when you are done:

4.png

Looks better now, but the splitters are a bit thick by default. It’s a little tricky to do, but you can shrink down the splitters to be about 1 pixel wide and almost invisible by grabbing the resize terminals in the middle of the splitter when you hover the mouse over it.

The next step that was not obvious before is relating to the buttons. We really would like the buttons to stay on the right side of the screen as it resizes, and keep the digital indicators on the left side of the screen in line with the graph. That will keep things looking clean as it resizes. How can we accomplish this? Add another splitter. Drop a vertical splitter just to the left of the buttons.

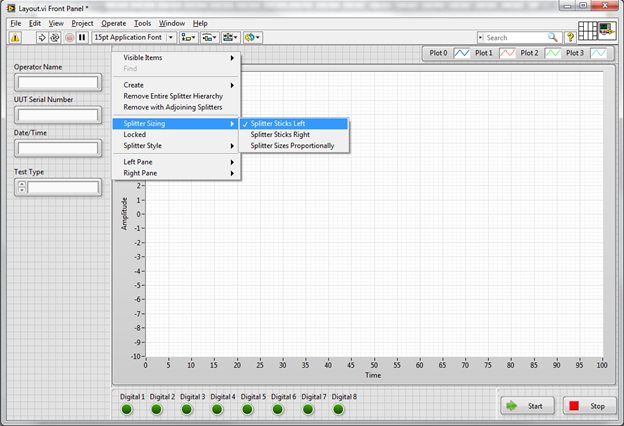
Next we need to define which way each pane sticks, grows, and shrinks. This is all configurable from the right click menus on each splitter. By default, each pane will stick to the top left corner and will not resize when dragged. These default settings are good for our left pane, and our digital indicator pane. For the buttons, we want slightly different behaviour to keep the buttons on the right side of the screen.

Configure all the splitters as listed below:

  • Right click on the left splitter and select Splitter Sizing -> Splitter Sticks Left
  • Right click on the bottom horizontal splitter and select Splitter Sizing -> Splitter Sticks Bottom
  • Right click on the bottom vertical splitter and select Splitter Sizing -> Splitter Sticks Right

5.png

If you resize the screen now you’ll see the desired behaviour. There is one last step, which allows the graph to resize. In order to do this, simply right click on the graph and select “Fit Control to Pane”.

That’s it. Now resize the screen all you want, it will always lay out nicely. To add more controls and indicators with their own behaviour, just keep adding splitters as necessary.

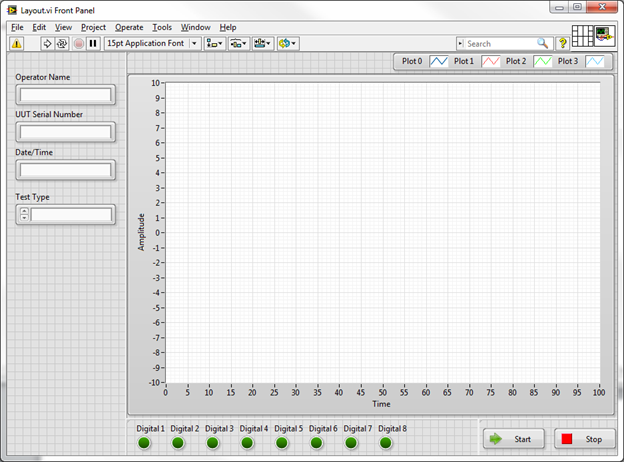
Your screen should now look like this:

6.png

Minimum Screen Size

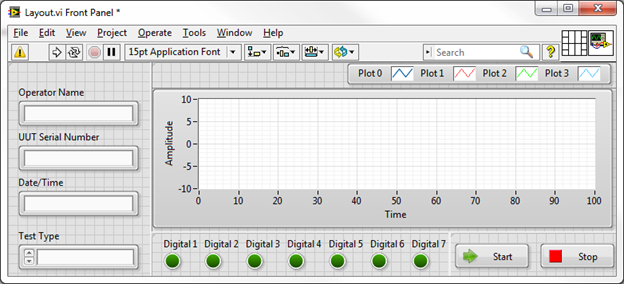
Once you have set up your UI, it’s generally a good idea to compress it down until it’s as small as possible while still being usable and set a minimum screen size. This will ensure users don’t make the window smaller than you ever intended (which can introduce some odd bugs in the LabVIEW layout).

Accomplish this with the following steps:

  • Shrink the window down as small as reasonably possible without covering up any controls/indicators/labels
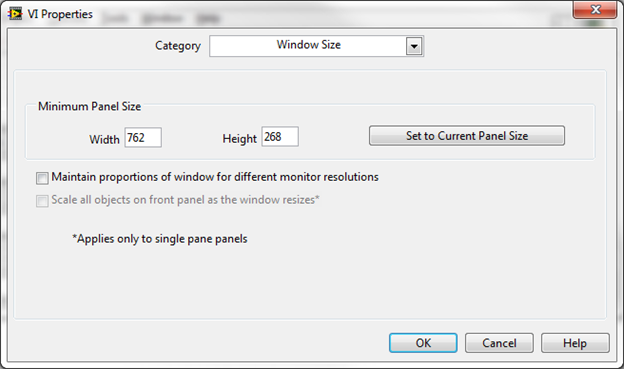
  • Go into VI Properties -> Window Size and click “Set to Current Panel Size” and click OK.

7.png

8.png

Conclusions and Next Steps

This was a simple demonstration for creating a simple, professional looking and scalable user interface. These concepts can be extended into much more complex interfaces involving tab controls, subpanels, XControls, etc. These more advanced topics are covered in my next blog: Advanced Resizable UIs: Multicolumn Listboxes.

Graham Beauregard

Prolucid Logo.gif

http://www.prolucid.ca

~Samuli
30531 Views
24 Comments

Hi All,

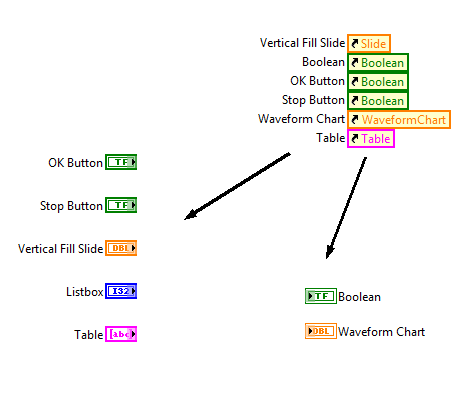
I created this tool for manipulating Front Panel objects (Controls/Indicators). If you work with UIs a lot then this tool is great for you! The main idea is that usually when you need to control UI object properties you will first put those references to for example cluster (because you cant use Array) and then reuse that cluster/references later on with your code. But that is not really good way to do it. Mainly because it is a mess and it always requires some work. Lots of references with different reference types etc. Lots of wires going all over etc.

So developers usually start with collecting those references like here:

UIRef1.png

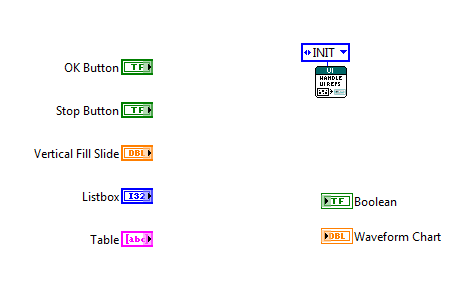
But I don't like that method. Why not just do it like this:

UIRef2.png

That VI will automatically get all references to really fast memory place which you can use later on where ever you want (subVIs etc) with this another tool:

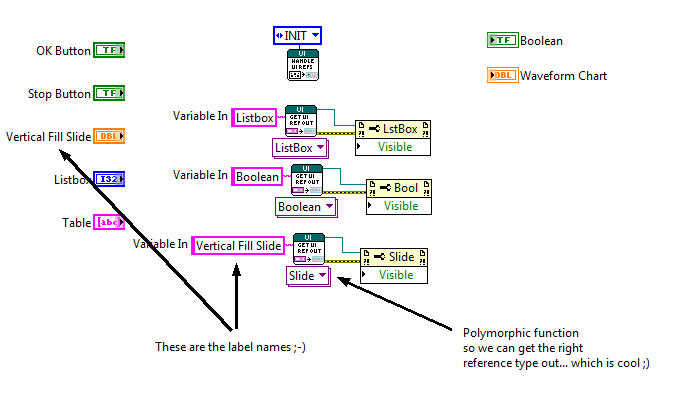
UIRef3.png

So you can use Label names to get the right reference to that control or indicator Is that cool or what? And it's pretty fast too. So which Control&Indicator types are supported? Well here is the list:

UIRef4.png

You may also use that function with any VI that is in LV memory by calling it with VI name when you initialize that function (if you leave it empty it will use caller VI):

UIRef5.png

I also included an example program that you can use...

Enjoy!

Br,

Samuli

EDIT v4: Added updated files. Also for LV 8.6

Download All
~Samuli
18445 Views
11 Comments

Hi all,

I have been building this cool UI demo for cDAQ systems. It's not 100% ready but I think I can release the source code and the idea for you guys. I always like to share my code...

What is it?

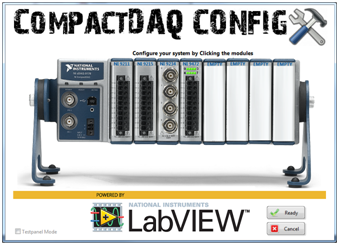
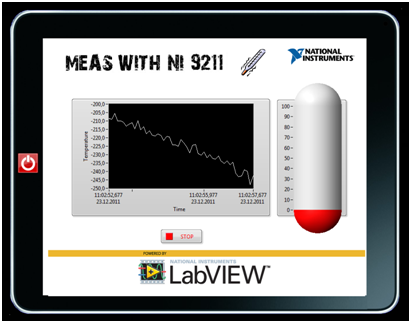
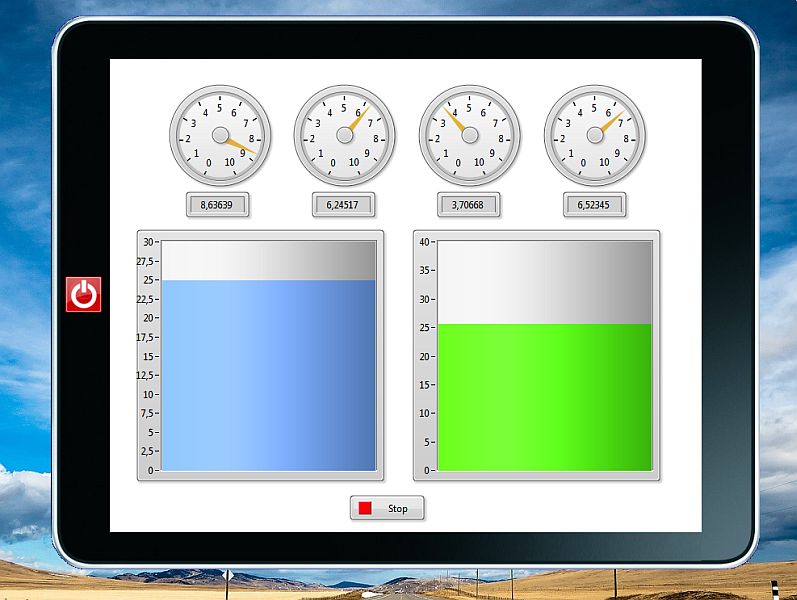
Just a cool cDAQ User Interface demo. With this demo you can configure your measurements with cool UI. The configuration part can detect current system even if you add/remove modules during runtime. The UI will change according to current system. Which is pretty cool (specially with real HW). Also the measurement part has a cool UI (iPAD look and “touch screen like” scrolling effect).

Why I made this demo?

With LabVIEW it’s pretty easy to build something like this. So this is just an example how to create cool UI with LabVIEW.

How to demo?

There are multiple ways to demo this SW but I like to do it this way.

1.) Open MAX

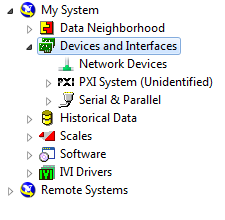
Make sure you don’t have cDAQ devices or any other device on MAX under Devices and Interfaces:

pic1.png

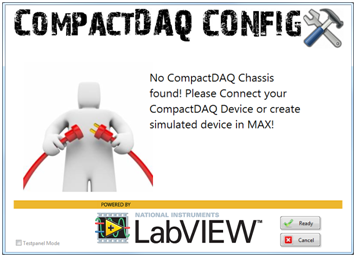
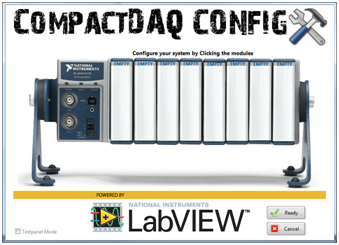
2.) Launch “cDAQ - UI - Main.vi”

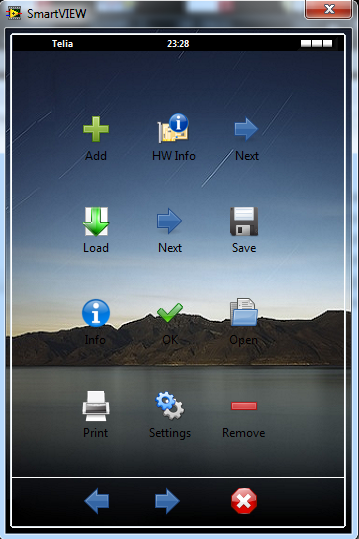
It should launch and you will see this screen:

 
pic2.png
 

3.) Create simulated NI 9178 Chassis with MAX


Goto MAX (resize and move it to next to the LV screen) and create new simulated NI 9178 chassis:

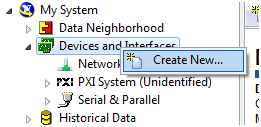
First select “Create New…”:

pic3.png

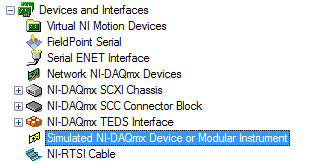
Then select “Simulated NI-DAQmx Device or Modular Instrument”:

pic4.png

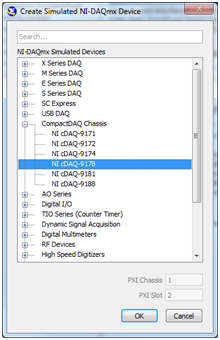
And Select “NI cDAQ-9178”:


pic5.png


Now the LabVIEW UI will detect the Chassis:

pic6.png

4.) Add modules to the Chassis:

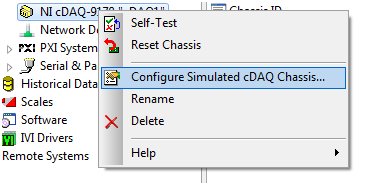
Right click the Chassis in MAX and select “Configure Simulated cDAQ Chassis…”:

pic7.png

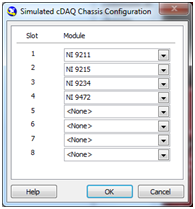
Add these modules:

  pic8.png
 

The SW should now discover those modules (you can delete/add modules and it should discover those automatically):

pic9.png

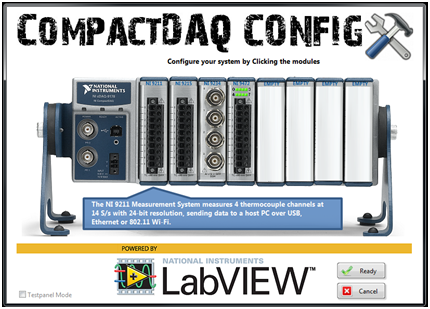
Mouse Over those modules and you will see a description of the module:

pic10.png

Then select “Testpanel Mode”:

pic11.png

Now click one of those modules and it will open the Test Panel Close the Test Panel…


Uncheck the Testpanel Mode and click the module and it will then open the configuration window. Use the defaults and just select OK (do it for all of those 4 modules😞

pic12.png

After you have done all four configurations Click the “Ready” button:

pic13.png

And it will then launch the iPAD screen with measurement VIs running (Scroll Left or Right by using your Right mouse button):

pic14.png 
 

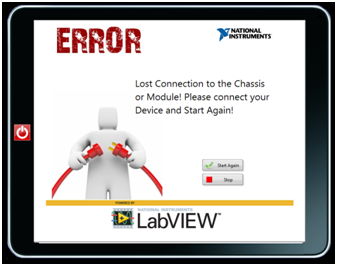
If you now remove for example the first module (or whole system) from the MAX then this will show up:

pic15.png

Put the module back and hit the “Start Again” button and the code should continue measurements.

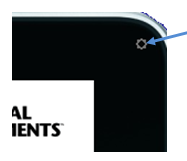
If you use this SW in a tradeshow etc then you can use the hidden feature to automatically change the measurement screen within 5 seconds. Try to find the small hidden “Radio button” from the upper right corner (just click with your left mouse button all over there):

pic16.png

When you find it and click it on it should look like this:

pic17.png 
 

Can I use it with Real HW too?

Yeah you can use this code with real HW too But please use with these HW only:

Chassis types: NI cDAQ-9171, NI cDAQ-9172, NI cDAQ-9174 or NI cDAQ-9178

Module types: NI 9211, NI 9215, NI 9219, NI 9234, NI 9263 and NI 9472.

You may add more modules if you create new settings and measurement VIs here: …\Dynamic “Loading\Settings and …”\Dynamic Loading\MeasUIs

Enjoy!

Questions? Please let me know

TODO:

  • Support for NI cDAQ-9181 and NI cDAQ-9188 
  • Support more Modules
  • Better recovery from Error

Br,

Samuli

UPDATE: Added support for NI cDAQ-9171 chassis 😉

SimonH
27762 Views
14 Comments

I was answering an email from one of our systems engineers this week and dug up this old demo to show him how you could quite easily implement sliding panels in LabVIEW.  While I've shown a similar technique before I realized I've never shared this particular demo.

What's cool about this demo is that you can have multiple panels sliding at the same time and the animations can be interupted mid-animation.  Here's a video of it in action:

You can download the attached to code to see how I did it (LabVIEW 8.6 source IIRC).  I haven't documented the code much and it's been a while since I last looked at it so please excuse any less-than-perfect coding style you see in there.  If you have any questions, leave them in the comments and I'll try and answer them.

~Samuli
16178 Views
3 Comments

Hi folks!

I created this example to Northern Region NIDays 2011 (Finland, Denmark, Norway, Sweden, Netherlands, Belgium). It was the most popular Demo regarding to User Feedback. The idea is to create a UI that will work just like the Image Gallery sw in Smart Phones. So that you can scroll the FP screens. It will use Right mouse button instead of Left. This is because I'm using Sub Panel and there would be no point to use left mouse button to execute events if user really wants to use FP objects for example vertical slider etc. In the ZIP file there is actually three demos. There is Image Gallery that works with Left mouse button and there are two VI Gallery versions. First one is just a simple version and the other one is actually "iPad" version (round edges). Sorry but I did not have much time to comment the code but it's quite simple anyway If you have any questions please let me know.

Here are some instructions & Tips:

Image Gallery Demo:

- You can add/remove pictures to/from "Pics" folder.

- Use your LEFT mouse button as your finger or use Touch screen (drag+release left or right).

VI Gallery Demos: 

- Use RIGHT mouse button. "Drag+Release" Left or Right..

- You can add more files to "Dynamic Loading" folder. Use the same FP size. It's easy to just open one of those example files like "ExampleVI_1.vi" modify the code/fp and save it with a new name. Restart the Main VI and it should work automatically.

UPDATE: I added a Zip file to this post (removed some pictures from Pics folder).

Screenshots:

imagegallery.jpg

vigallery.jpg

Enjoy!

Br,

Samuli

HW_DAN
12431 Views
0 Comments

My current project is to design a Labview UI on the LabView host computer and interface using ethernet to control some simple power distribution boxes to cycle the power to computers. And use the LabView (Host computer) to capture the boot information like errors that is coming back on many serial ports from those computers.

Labview will control the number of user specified reboots for the computers being tested and also capture and log all boot data from multiple re-boots. This is a very simply implementation of Labview and if I can acheive this with little cost impact then I will impliment Labview across our other more complex systems.

Does anyone have an idea of what the setup and UI might look like?

YoungZaphod
16576 Views
5 Comments

iPhone_Switch.pngHere is a nice little custom control to make LabVIEW more like your iPhone.

PelleS
25235 Views
5 Comments

First of all, excuse me if someone else already done this, but I can't find a similar example.

The attached example shows how to implement the "fluid-like" way of scrolling through a list of apps (i.e. controls) just like you see in smart phones. You left-click the mouse to grab onto the list and when you move the mouse the list will follow. As you release the mouse the velocity is calculated and the scrolling attenuates gradually.

I have used a cluster to group the controls to get a cleaner code, but I guess you could scroll the panel just as well, or a listbox or....whatever. The thing you need to do is to dynamically change the objects position. In this example I have only implemented a vertical scroll.

The code is developed without any subvis and without any elaborate design. I have only tried to quickly create an example for you to build from.

So please try to optimize this before you implement it in a real program. The scrolling is eating lots of CPU, that's because mouse move events are triggered all the time. Probably a producer-consumer design pattern would be more efficient.

Untitled.png

To get nice icons I have just used the boolean system controls found here: http://decibel.ni.com/content/docs/DOC-9921

/Pelle

Download All
SimonH
20906 Views
1 Comment

Windmill Preview.png

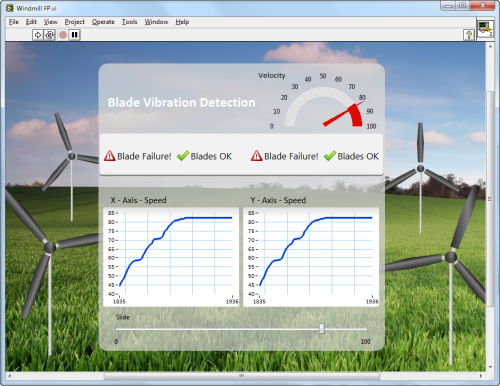
At NIWeek 2009 we demoed the LabVIEW Web UI Builder with a very slick looking windmill blade monitoring application:

While this demo was obviously made using the in-development LabVIEW Web UI Builder the same visual effect can be created in your desktop LabVIEW applications today. 

The attached VI shows the same UI implemented using some of my favourite techniques (namely recoloring graphs, panel backgrounds, using PowerPoint to create decorations, and using transparent images in a picture ring). 

Other tips:

  • The key to getting the rotating animation is to rotate the image in PowerPoint and save each rotation as a new image.  Place each image in a picture ring and use the picture ring value to flip through the frames of your animation.  The speed at which you update the value determines the speed of the animation.  This is a very simplistic way of doing things and can bog down the CPU if you are updating the front panel too quickly (the human eye can only see ~10-20 frames per second, there is no need to update faster than that) -- a more advanced technique would involve only updating the image every 100 ms or so and calculating how which frame to skip to in order to simulate the "speed" of the rotation.
  • The Blade Failure!/Blades OK indicator is simply a button using the check mark and the warning icons as the true and false images respectively.
  • The velocity "meter" at the top is really a gauge.  I have edited the scale to only use 180 degrees of the dial and made the frame transparent.  I then made the ramp visible and colored it accordingly.
  • The graphs come from my ni.com inspired control suite

As always, I've attached the VI (LabVIEW 2010 format -- sorry, I have a small HDD and only keep the latest version installed) along with a zip file of all the source images (all images except for field.jpg were saved as images from the included .pptx file).  I also saved the windmill as it's own .ctl file if you care to reuse it (I'm not sure how many people work with windmills so this may be of marginal benefit to most of you).

Download All
TCPlomp
19673 Views
10 Comments

For a good looking GUI, it might be nessecary to have multiple window icons in one applicatino, for this purpose I have created a tool-vi that uses the windows API with the WM_SetIcon message and the LoadImage method to change the icon of a single VI front panel window:

SetWindowIcon.png

With this VI you can change the icon of a single front panel window, here's alittle video showing this feature

Hope you enjoy this little tool, if you have the possibility to test/alter the VI for Windows 64-bit, Mac or Linux, please post your updates!

EDIT: There was a small bug in the program that caused it to work for only one VI at a time, now it works for multiple VIs, you can set and reset at any moment you want, the tool should remember what the original icon should be. It is not advised to multiple times use a set and then use a reset.

To use this tool you'll need to have the OpenG Application Control toolkit installed.

Download All
SimonH
50327 Views
22 Comments

I had the chance to make a presentation for NIWeek and our Developer Education Days sessions this year and I decided to focus on highlighting some little known LabVIEW features and techniques that enable you to create very usable and attractive user interfaces.

Just in case you weren't able to make it out to the event in your area, here is all the juicy content:

Slides/Notes

Windows Application Example

Touch Panel Example

Informative Kiosk Example

In addition to the source code above I recorded videos of all the "how-to" demos, enjoy:

Add Decals to Buttons:

Using Tooltips:

Hide the LabVIEW Toolbar:

Customize the Run-Time Menu:

Recoloring Graphs:

Use the busy cursor:

Using panes:

Spawn dialogs:

Panel backgrounds:

Create decorations in PowerPoint:

Transparent indicators:

Transparent PNGs in a picture ring:

KvZ
Active Participant
29941 Views
11 Comments

Hi Everyone,

I've been using Windows 7 for a while now and I must say I like the improvements to the Taskbar. One feature that stood out to me, and which could be practical in a LabVIEW applications doing post processing for example, was the integrated progressbar in the Taskbar buttons.

Normal Progress.pngPaused Progress.pngError Progress.png

Seeing it's the last day be for Christmas I thought lest try and see if we can control this from LabVIEW. On the MSDN library I quickly found that there are two functions available on the ITaskbarList3 Interfaceto control the Progress bar behavior. Namely SetProgressState for controlling the State of the progressbar (Normal, Paused, Error, Indeterminate and NoProgress) and SetProgressValue for updating the progress. The only problem was that this is a static COM Interface implemented by Microsoft and I was unable to create this with the LabVIEW ActiveX interface API.

If I can't access an arbitrary feature with LabVIEW I typically tend to try and see if it can trough .Net. Because .Net is much more defined it's much easier to use in LabVIEW then a Win32 DLL or ActiveX COM object. In this case the nice developers from Microsoft already made a Interop Libraries for the Windows 7 Taskbar. This is basically a big example that you can add to your own .Net Application to access the Features of the Windows 7 Taskbar without having to program all the interoperability your self.

I just wanted to access the Progress Bar so I browsed trough the examples and build a Assembly that only exposes the two functions I needed (SetProgressState and SetProgressValue). Both functions require the Window Handle indorer to know which taskbar button needed to be updated. I already had VI that used the Win32 FindWindow function to retrieve the Window Handle of any Window based on it's exact Title. (This includes VI Front Panels ). I slightly altered this VI so it would return a IntPtr .Net Object instead of a the plain U32 so it can be used with the .Net InterOp functions. All that was left was wrapping the SetProgressState and SetProgressValue in a SubVI and the fun can begin.

Attached you can find a simple LabVIEW 2009 API and Example that uses the .Net Assembly to call in to the Windows 7 Taskbar. I also Included the C# source code of the assembly for those who are interested.

Have fun and let me know what you think.

Enjoy the Holidays

Karsten

UPDATE: LabVIEW Tools Network Release

The code from this blog post has recently been updated and released to the LabVIEW Tools Network as the LabVIEW Taskbar Progress bar API

This release requires LabVIEW 2010 or later. LabVIEW 2009 users can still use the original code attached to this blog post.

Karsten

SimonH
30586 Views
29 Comments

Initially I dismissed the idea of recreating the "Office Fluent Interface" (more commonly referred to as the "ribbon") in LabVIEW as being more trouble than it was worth.  Typically the types of applications that we create with LabVIEW aren't the option heavy editor type applications that the ribbon was designed to help simplify and the only thing worse than an ugly user interface is one that is needlessly fancy (and consequently less usable).  Now the question keeps coming up every once in a while so I decided to take another look at it. 

Besides hiding behind ideology I admit that it sounded pretty difficult at first.  I have used Microsoft's .NET ribbon when I was playing around with WPF and, coming from the LabVIEW world, it wasn't what you would call intuitive to set up (you need to interact at the XAML-source or programming API level - it isn't all drag-and-drop, even in Visual Studio, and I'm still very new to XAML).  Add to that the complications of trying to communicate custom UI events efficiently between LabVIEW and .NET and it became apparent that re-using the .NET component would indeed be problematic.  If anyone has gone down this route please do let us know how well you faired in the comments.

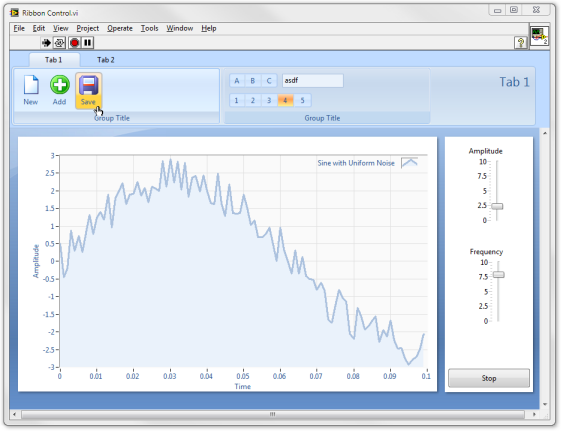
Instead I decided to create most of the ribbon's look and feel using native LabVIEW controls and a few custom graphics created in my favourite UI mockup tool (aka PowerPoint).  Here's a screenshot of what I managed to come up with:

LabVIEW Ribbon.png

While I didn't implement every feature of the ribbon it still feels pretty authentic.  Moving the mouse over the tab controls and buttons gives the familiar yellow glow, groups highlight slightly when the mouse enters, clicking on the current tab will minimize the ribbon and move all the content up, clicking on a tab again will bring it back, etc.  Best part about it is it is all one small VI - no XControls, .NET controls or subpanels required.  I have attached a zip file containing the VI and all the source graphics as usual (LabVIEW 2009 format - sorry for those of you with older versions, I only keep the latest version installed since my laptop has a small HDD and developing without quickdrop and diagram cleanup is just frustrating having used it for a while now).

It's getting late so I won't go into all the implementation details but here are the basics for those trying to figure out what I did:

  • The main part of the ribbon is a transparent tab control with the tabs hidden
  • The "tabs" that you see are actually customized system buttons (to get the mouseover effect and the custom behavior)
  • The groups are also transparent tab controls with only one page (this gives me a nice container to trigger mouse enter and leave events from)
  • The ribbon occupies the top pane of my VI (with the splitter shrunk to 1-pixel and made a nice shade of blue to blend in) - repositioning the splitter let's me "minimize" the ribbon.

Hopefully this gives you some ideas for you own projects.

Happy wiring,

Simon

YoungZaphod
19242 Views
1 Comment

FancyPopUp2.png

You can make pop-up windows quickly and easily by using tab controls.

By using tab controls, you can create the same visual effect and the same functionality as a pop-up window, but you don’t need to create a sub-VI. Since you never leave the VI, you don’t need to worry about passing information into and out of the dialog, simplifiying the code.

While this technique may not be appropriate for every situation, it is a nice trick to have when you need a quick pop-up window.

Example VI attached.

See also:

http://www.seneca5.com/blog/2009/09/easy-pop-up-windows/

YoungZaphod
15884 Views
8 Comments
ListBoxIcons2.0.pngThe standard LabVIEW listbox control has very archaic icons. So I made some improvements. You can use this control as a direct replacement for the standard control, but it looks a lot better.


This takes advantage of the properties for the listbox to load your own custom graphics.

Download from Seneca5